How to Clean and Sharpen Cordless Pruning Shears
Cordless pruning shears have become a star tool in gardening due to their convenience and efficiency. However, after long-term use, the blades easily become dull due to sap and soil accumulation, and dust and impurities can accumulate in the crevices of the shears. These problems not only make pruning with cordless pruner shears more strenuous and damage plant branches, but can also accelerate component corrosion and shorten the tool’s lifespan. Regularly cleaning and sharpening garden shears will keep the blades sharp and extend their lifespan, ensuring smooth and efficient gardening every time. Below is a detailed breakdown of the specific operating steps!

Uses of Cordless Pruning Shears
Cordless pruning shears are convenient tools for gardening, primarily used for pruning sharpen pruners and managing various branches. Whether it’s shrubs, roses, fruit trees in a home garden, or dead and dense branches in potted plants on a balcony, they can handle it with ease. They can quickly cut branches of suitable thickness, precisely shaping the plant, and promptly remove diseased and weak branches, promoting ventilation and light penetration for healthy growth.
Beyond home gardening, they are also suitable for small nurseries and landscape maintenance. The cordless design eliminates the constraints of power cords, allowing for flexible movement and easy access to branches in high places or corners. Combined with sharp blades, their cutting efficiency far surpasses traditional manual pruning shears, greatly saving physical effort and time. They are practical equipment for gardening enthusiasts and professional gardeners to improve work efficiency.
Importance of Clean and Sharpen Cordless Pruning Shears
Cleaning and sharpening pruning shears is not just a simple routine tool maintenance process; it is a core key step in balancing gardening efficiency, extending tool lifespan, and ensuring healthy plant growth. The sharpness of pruning shears is related to the smoothness of each pruning, the durability of the tools, and the growth and survival status of the plants. It is an important prerequisite for making gardening easier, sharpen pruners more durable, and plants stronger.
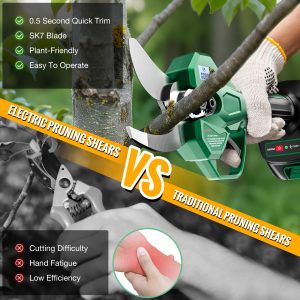
Protecting Pruning Shears
Cleaning pruning shears effectively removes sap, dirt, and twig debris from key parts such as blades and moving shafts, preventing these impurities from accumulating and solidifying over time. This pruner sharpening reduces friction between parts and prevents problems like jamming and corrosion on the shear shaft. Sharpening pruning shears specifically repairs dulling, curling, and minor nicks on the blades caused by repeated cutting, preventing excessive shearing resistance during dulling operations and thus avoiding additional load on the pruning shear motor. It also reduces wear on gears and other transmission components, extending the overall lifespan of the machine, battery, and blades, ensuring the tool maintains stable core performance over the long term.
Improve Cutting Efficiency
Cleaned garden scissors pruning shears, free from impurities, operate more flexibly and smoothly, less prone to jamming. Combined with sharpened blades, they can quickly and cleanly cut various branches without repeated squeezing or angle adjustments, significantly saving time per operation. Simultaneously, the sharp blades significantly reduce resistance during cutting, eliminating the need for extra force and reducing physical exertion. This is especially suitable for extended gardening sessions or pruning thicker branches, preventing fatigue from excessive effort and making your pruning process easier and more efficient.
Protecting Plant Health
Cleaning thoroughly removes bacteria, insect eggs, and other pathogens from the blade, preventing cross-infection when pruning different plants. This significantly reduces the risk of cut rot and plant disease, especially for disease-prone plants like fruit trees, effectively preventing common diseases such as rot. A sharpened blade allows for clean, one-cut cuts, avoiding tearing and crushing damage to branches caused by a blunt blade. This keeps the cut smooth and neat, accelerating wound healing and reducing nutrient loss, comprehensively ensuring normal plant growth and robust health.

Steps for Cleaning and Sharpening Garden Pruners:
Preparing Cleaning Tools
To clean pruning sharpen pruners shears, you will need to prepare the essential garden scissors, such as a soft cloth, a soft-bristled brush, an old toothbrush, warm water, and a neutral detergent. For pruner sharpening, use 400-600 grit sandpaper or a dedicated sharpener. Before cleaning, you need to turn off the power to the pruning shears and remove the batteries to ensure complete power disconnection. Wear protective gloves to prevent cuts from the blades. Choose a flat, dry work area and keep it away from children and pets.
Thorough Cleaning
First, clean the exterior of the garden shears body. Then, wipe away garden scissors surface dust and dirt with a soft cloth. For stubborn stains, gently wipe with warm water and a neutral detergent. Next, carefully clean the switches, handles, and battery ports with cotton swabs, taking care to prevent liquids from seeping into internal parts. Then, clean the blades. Use a soft brush to remove surface debris.
For areas where sap has hardened, cover with a soft cloth soaked in warm water for 5-10 minutes to soften it. Then, gently brush along the blade direction, paying special attention to the connection between the moving and stationary blades to ensure no residue remains. Finally, thoroughly dry the machine body and blades with a dry cloth to prevent moisture from causing rust.
Precise Sharpening
When sharpening pruning shears , you need to first check the condition of the blade, observing whether the shears have curled edges or dullness. Then, use a marker to mark the areas to be sharpened. If using a whetstone, maintain the original angle of the blade, usually 20-30°. After wetting the whetstone, apply even pressure and sharpen in one direction along the blade. Then, sharpen on the other side until the edge is shiny. If using sandpaper, lay the sandpaper flat and fix it in place. Place the blade against the sandpaper and lightly sharpen in one direction. If using a dedicated sharpener, follow the tool instructions and push the blade against the grinding edge at a uniform speed.
Pruning Shears Maintenance
After cleaning and sharpening garden pruners sharpening shears, apply a small amount of lubricant to key areas such as the blade joints and moving parts. Gently open and close the blades to distribute the lubricant evenly and reduce friction. Spray a layer of rust inhibitor on areas prone to rust, especially in humid environments. You can also wipe the battery surface and connectors with a dry cloth to ensure there is no dust or impurities. Clean the charger and store it properly.
Proper cleaning and sharpening of cordless pruning shears will ensure they maintain excellent performance, allowing you to efficiently complete every gardening task. If you encounter any questions regarding tool compatibility, maintenance details, or would like to learn about specific care tips for MVM cordless pruning shears or to select the appropriate model, please feel free to contact us. Our professional team will provide you with precise guidance, making your gardening tools more worry-free!